In this rather technical post, we describe our experience packing and preparing our two recumbent bicycles for air-travel.
The flights
We flew from Lisbon to Rio de Janeiro with Royal Air Maroc, with a stopover in Casablanca, in October 2016, and on to Porto Alegre with LATAM. We flew back to Europe with LATAM in February 2017, from Puerto Montt (Chile) to Madrid, with a stopover in Santiago de Chile.
Packing the recumbent bicycles
For us there were two main issues when it came to the choice of packing: the maximum size, and adequate protection of the bikes. On the internet, we had read about people air travelling with recumbent trikes without dismounting or packing them at all. We feared that this might not be possible with recumbent bicycles: our seats are higher than trikes and thus increase the height of the recumbent, and a trike might more easily be assimilated to a mobility device rather than a bicycle.
Issue 1: Size
A maximum size may or may not be stated on airlines’ websites, and the price may vary according to the size of the bike. But the most important limitation is something different: the size of the luggage scanners. When we checked in our bicycles at Lisbon airport, the lady who scanned the luggage insisted that we take off the rear wheel, because otherwise the bikes would not fit into the scanner. This may make sense for standard bicycles, but not for recumbents (taking off the rear wheel would rather increase the size of the package). We asked her what the width of the scanner was – she didn’t know. Fortunately, we did. Most airport luggage scanners seem to measure 90 cm in width (at least those that we have seen all seemed to be this size). We also knew that our bikes measured less than 90 cm. The lady let us try and, oh miracle, they fit.
First lesson: Get information on size limitations, and know the exact dimensions of your bike.
Another experience stressing the importance of the first lesson: At the check-in at the Royal Air Maroc counter in Lisbon, one of the ladies insisted that our bikes must be more than 200 cm in length (the pricing was different for bikes below and over 200 cm). We know they were not – they measured less than 180 cm. We only got the correct price when insisting a lot and presenting a print-out of an e-mail we had requested from the airline’s office confirming the price for the bicycles.
Second lesson: Contact the airline beforehand and try to get a precise and written confirmation of the price for transporting your bicycle. It might also be useful to carry a small measuring tape on the day of travel in case you need to prove that your bike is within the admitted dimensions.
On our return flight, we actually paid less than the price stated on LATAM’s website (120 USD per bike instead of the 200 USD stated on their page). We don’t know why but we obviously didn’t insist!
Issue 2: Packing
Packing instructions for bicycles vary on airlines’ websites, but there are some almost universal instructions: turn the pedals inwards and turn the handlebar parallel to the bike frame. Sometimes they require boxes or “other appropriate packaging”. A few airlines will allow the bike to go “naked”.
Because of the size of our recumbents, we had to take off the seat. As we already had a lot of luggage, taking the seat in our regular luggage was not an option and we had to fix it to the bicycle frame, thus requiring at least a minimum of wrapping. Our recumbents also have quite a few cables hanging free, thus in danger of being torn off by luggage handlers. We therefore chose the option of packing the bikes completely. We chose transparent plastic instead of a cardboard box, so that handlers would see the bicycles and (hopefully) treat them with respect and avoid putting a lot of other heavy luggage on top of them.
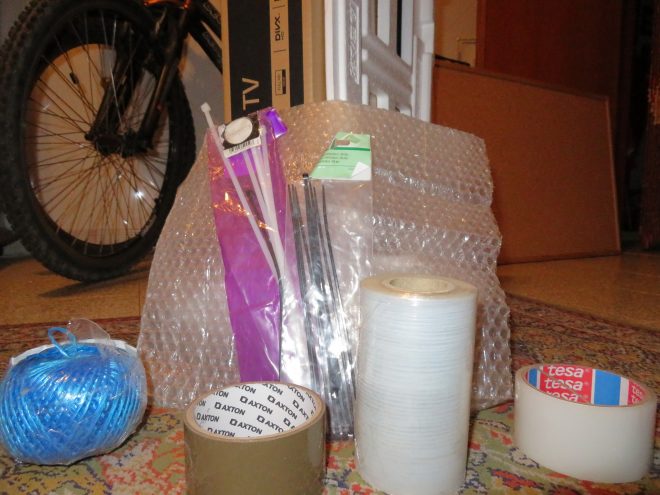
Packaging material for two recumbents:
- Bubble wrap: One and a half big rolls
- A roll of cellophane wrap (cling film)
- Some string
- Three rolls of packaging tape (2 rolls to pack, 1 roll to take to the airport just in case)
- Some pieces of Styrofoam or some cardboard
- Cable binders
Packing the HPV Streetmachine
- Remove small accessories (mirror, flag), wrap separately in plastic and tape to the luggage rack
- Remove seat and disassemble (keep screws in a small plastic bag firmly taped to the bike frame)
- Attach front fork to the frame using cable binders
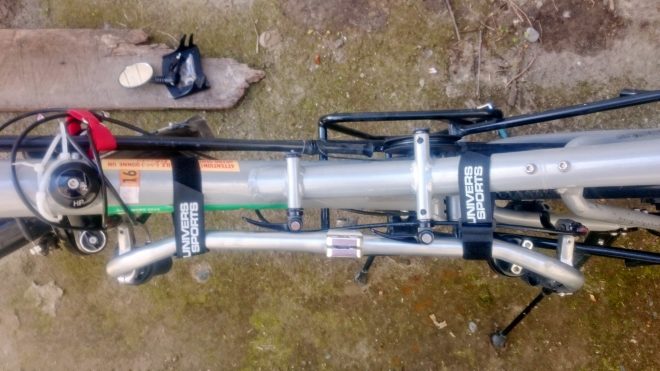
- Remove handlebar and gently turn parallel to the frame. Turn the stem so that it points towards the ground (see picture). Attach to the frame with two scratch straps (those made for holding skis together). Protect sensitive parts (grips, brakes, bell, etc) with bubble wrap.

Note: Brakes and barends may have to be loosened and moved slightly so that the handlebar fits nicely next to the frame.
- Use another scratch strap to prevent the brake and gear cables from sticking out too much on the side (the red strap on the photo taken from above).
- Protect protruding parts (front fork stem, quick release skewers, kickstand) with bubble wrap and tape.
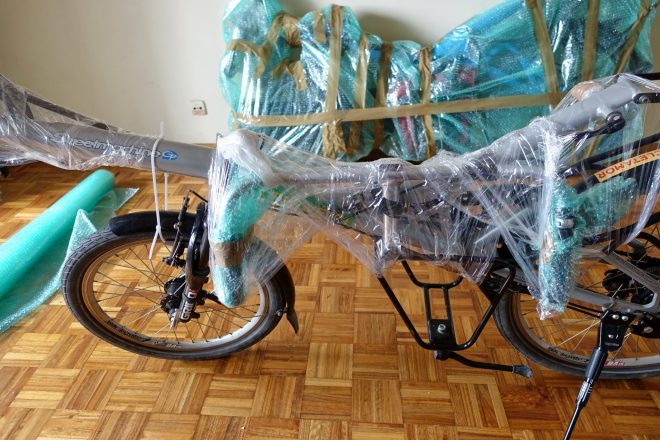
- Wrap cling film around handlebar and frame (for extra security).
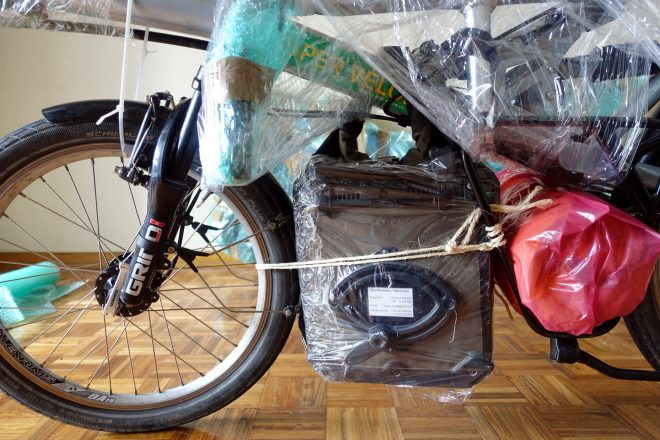
- I added a pannier (Ortlieb frontroller) with my sleeping bag below the frame, to add stability and to fix the position of the front wheel. On the first trip, I also added my camping mattress inside the lowrider rack, attaching everything firmly to the frame and front wheel with string.
- Unscrew pedals and re-attach facing inwards. Protect pedals, front lamp and crankset with pieces of Styrofoam or cardboard. On the second trip, I used only cardboard to fill the gaps between the lamp and crankset, and parts of a cardboard box to build a “box” around the pedals and crankset, attaching everything with tape, and then wrapping it with cling film. This worked well as the pedals didn’t get turned.
- Use folded pieces of cardboard to protect Rohloff chain tensioner (tape them to the frame).
- Wrap the two seat pieces in cling film, then attach to the front wheel and secure firmly to the frame with string and tape so that they don’t move.
- Deflate tyres (only a bit, not completely flat).
- Wrap the whole bicycle with bubble wrap. Use lots of tape to attach and make a compact parcel.
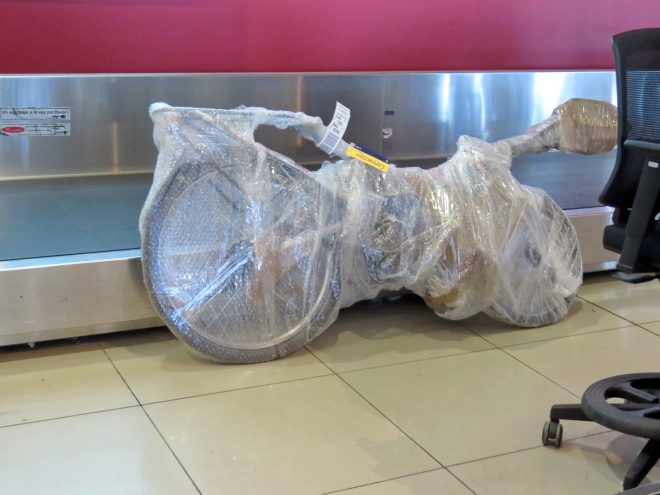
Packing the Azub Six
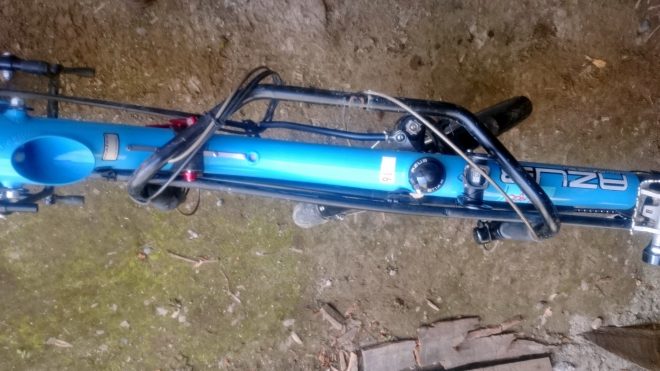
- The airlines might be meticulous about a total size of 300cm for the luggage piece (width+height+deep). To avoid this I pushed the front boom a few centimetres inside. The Azub painting isn’t strong and it left marks when I put the boom back into place. Measure the extension before moving the boom. For future flights, I will not do this as they don’t seem to check.
- Unscrew pedals and re-attach inwards. Attach one pedal to the boom on top with cable binders to make sure it does not rotate.
- Unscrew lamp (putting screw back into the hole) and protect/attach with cling film to the frame.
- Protect the crankset with strong layers of cardboard or Styrofoam and attach well with cling film and protect with bubble wrap. Make sure the lamp and pedals are also protected with card board and bubble wrap.
- Remove the seat and the seatpad, wrap in cling film or put them in separate plastic bags. Protect the metal parts that protrude on the back of the seat with cardboard or Styrofoam.
- Use some cable binders and rope to attach the front wheel to the fork and frame so that it does not rotate or turn to the sides.
- Attach the flag to the frame with packaging tape/cling film.
- On the first flight, I put one pannier with the sleeping bag and mattress below the frame, between the wheels, attached with rope and cling film. It removes the place for the handlers to hold the bicycle in the middle, but also protected the bike.
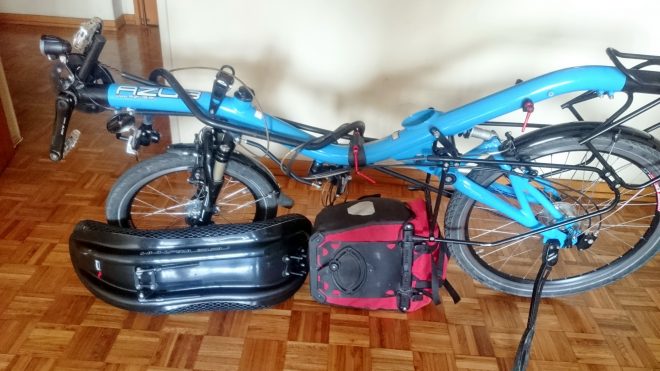
- Detach the handlebar (USS in my case), putting back the screws so you don’t lose them. Pass the bar to the left side of the bike and put it around the frame. Attach to the frame with some cable binder or string so it stays firm. Wrap well with cling film assuring no cables, bell, brake levers protrude to the outside (if necessary unscrew them a bit).
- Attach the seat to the right side of the bicycle, around the front wheel and fork with some rope. Do the same with the seatpad on the left side. Use cling film and packaging tape to attach the whole together with the bike.
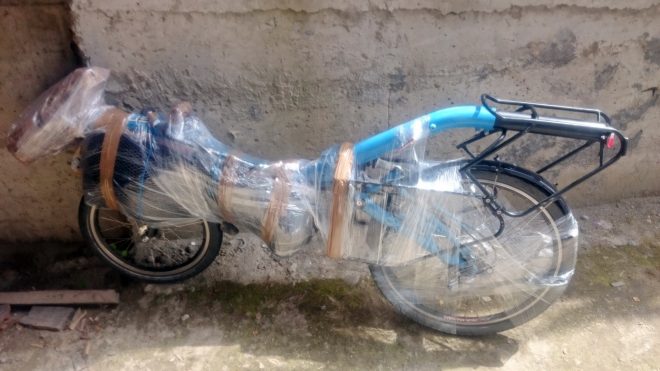
- Deflate the tyres a bit (just a minimum, so it is safe and there will be not much work to inflate them back on arrival)
- Put cling film around the luggage racks, the rear mudguard, and tires. Now I would have put also some cardboard protection above the rear luggage rack, as it got quite scratched (on the flight back) and the bubble wrap was open (on the first flight).
- Protect the whole bike with bubble wrap and packaging tape so it is compact.
- Make a nice hole for holding the bike between the rear of the frame and the wheel, well protected with packaging tape, to help holding the bicycle.
- The packed recumbent bicycle measured now 180 x 88 x 25 cm.
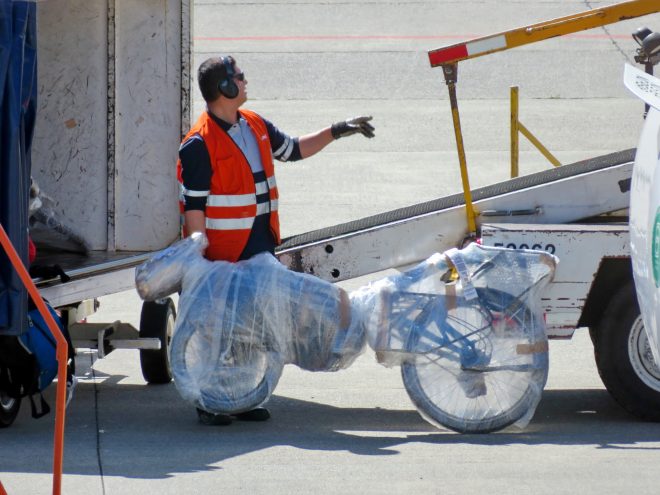

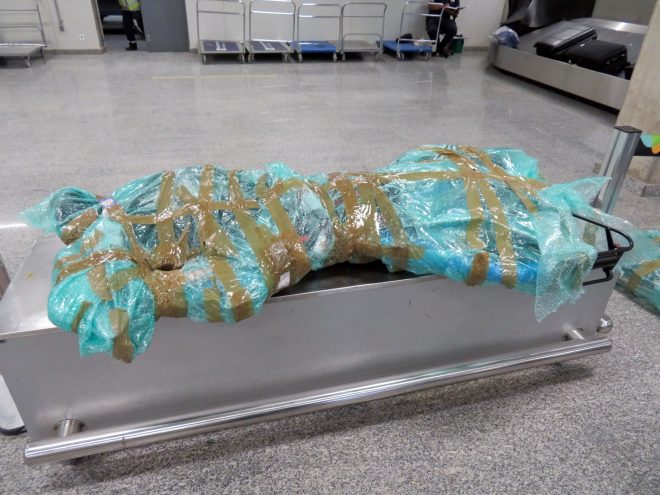
On the return journey, we wrapped the bikes more tightly with tape and left out more space to grab onto the main frame of the bikes.
In Lisbon both packed bicycles fit inside a Nissan Qashqai, only with the driver.
In Puerto Montt they went in the back of a pick-up, well attached with elastic strings.
How it turned out
Our packing method worked well as our bikes didn’t get any significant damage. The bubble wrap got ripped in a few places, so we were happy to have a roll of tape on hand during our stopover in Rio (where we had to get the luggage and check it in again).
Both bikes got several scratches on the frame and luggage rack, especially the Azub on the return flight. It seemed to have been dragged on the floor as the bubble wrap was ripped in those places. On the Streetmachine, the outer part of the chainring protection got bent on both flights despite the cardboard protection (fortunately it’s easy to bend back in place with pliers).
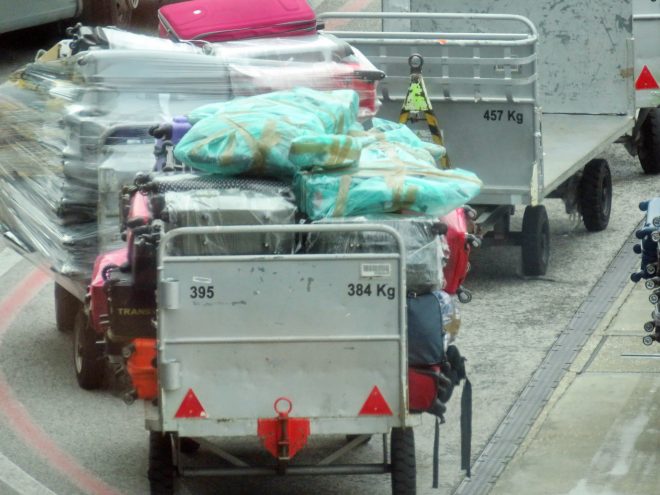
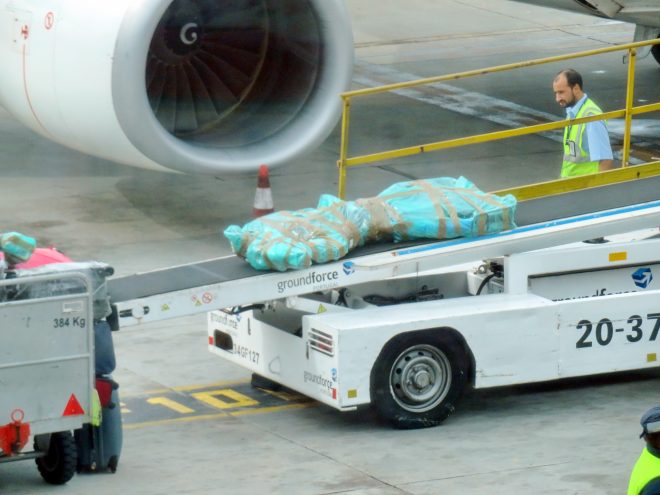
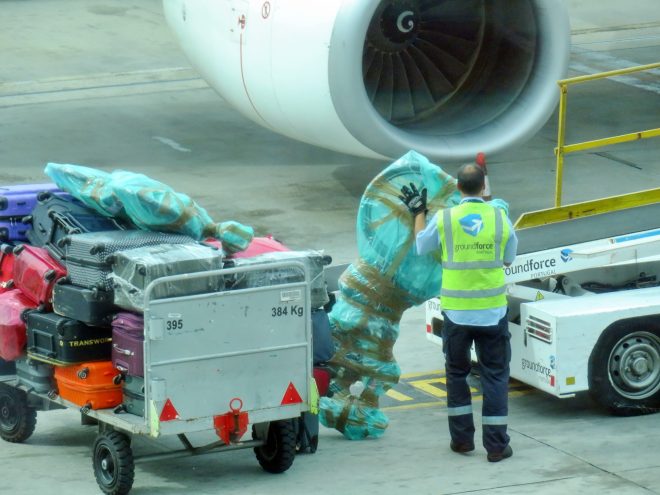
We could observe our bikes being loaded into the airplane on two occasions (in Lisbon and Puerto Montt). The luggage handlers seemed to recognize them immediately as bicycles and seemed to try to treat them reasonably well, although we can’t say that the handling was gentle… The bikes are quite heavy and not easy to carry by one person alone, the packages weighed 24 and 25 kg on the first flight, and around 20 kg on the return flight (the weight difference is a bit weird as not completely accounted for by the bags we added the first time – we think that the weighing was less accurate on the return). We saw the Streetmachine getting dropped on the floor, and when going up inside the plane on the automatic belt the bikes bumped against the metal railing. Of course, we don’t know what happened once they were inside the plane, but they probably got squeezed between other luggage.
Our conclusion
All in all, we were happy with our packing method. We were not so happy with the scratches, especially on the return flight, but were glad that there was no damage influencing the bikes’ function. Maybe some of the scratches could have been avoided by wrapping the main frame in cling film first. Would the bikes have been treated more gently if they had been “naked”? Who knows. On a next trip, we would probably be inclined to protect the frames a bit more.


I wouldn’t pack my bike this way again due to my experience flying to America and finding out the handlebar stem was broken due to being handled badly at Heathrow by baggage handlers and in front of me no less! Next time I will but a box they weigh 11 pounds and my bike weighs 33 so that’s well within the 50 pounds weight limit.
You left the derailleur in place and it wasn’t a problem? Everything I’ve read elsewhere says to remove the derailleur hanger when flying but that seems a bit complicated, so if it’s safe not to then I’d rather leave it on.
Hi, our bikes don’t have derailleurs as we have Rohloff gears, which only has a chain tensioner, which we left in place, protecting it with some folded cardboard.
I have traveled with recumbents many times, but the last time was about 10 years ago. We always left the derailleur on, but protected things with plastic water bottles. In the past we just bubble wrapped the bikes, even leaving the seats on, but I think airlines have gotten more picky about how they will accept bikes.